
Designing a dual shower with rain head ceiling can transform your bathroom into a luxurious spa-like retreat. If you’re thinking about upgrading your shower, this guide will walk you through everything you need to know, from planning to installation.
What is a Dual Rain Shower Head System?
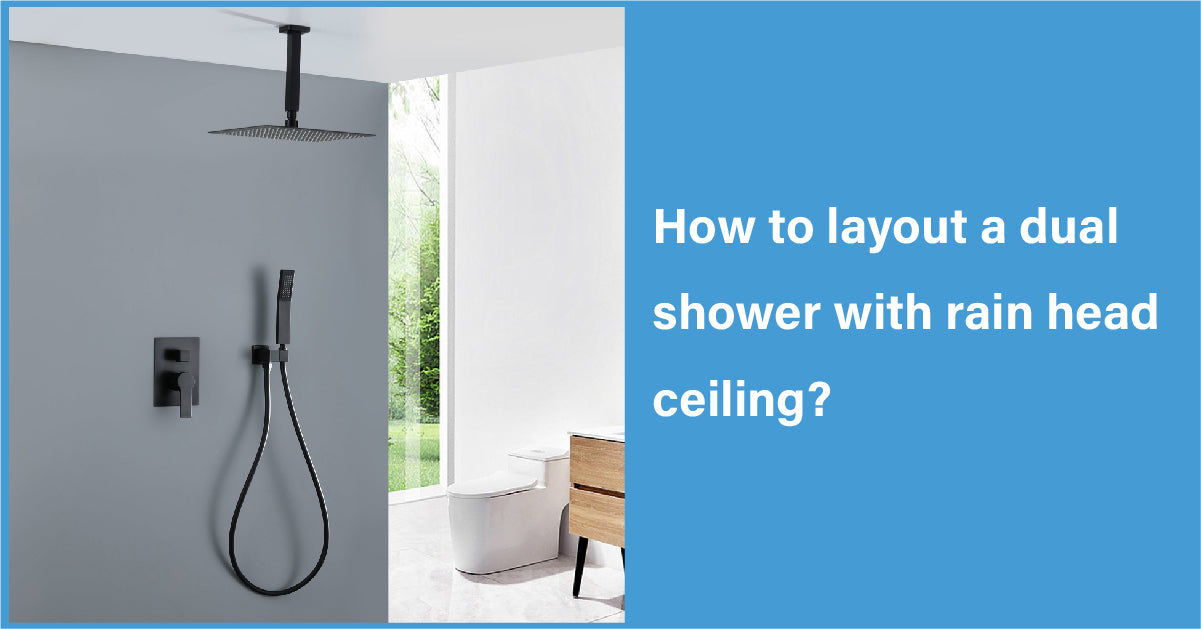
A rain shower dual head system includes two shower heads, typically a fixed one on the ceiling and a handheld one. This setup allows you to enjoy the gentle, soothing experience of a rain shower while also having the flexibility of a handheld shower head for more targeted water flow.
Benefits of a Dual Rain Shower Head System
- Enhanced Shower Experience: The combination of a rain shower and a handheld shower head provides a versatile and luxurious experience.
- Improved Coverage: Two shower heads mean better water coverage, making your showers more efficient and enjoyable.
- Aesthetic Appeal: Dual shower systems add a modern, high-end look to any bathroom.
Planning Your Dual Rain Shower Layout
Before you start installing, it’s essential to plan your layout. Here are the steps to consider:
Determine the Placement
Think about where you want to place each shower head. Typically, the rain shower head is installed on the ceiling, directly above where you stand, while the handheld shower head is mounted on the wall within easy reach.
Measure Your Space
Measure your shower area to ensure you have enough space for both shower heads. Make sure the ceiling height is appropriate for a rain shower head, which usually requires at least 7-8 feet of clearance.
Choose Your Fixtures
Select high-quality fixtures that match your bathroom’s decor. Look for dual rain shower heads that come with all necessary components for easy installation.
Installation Steps for a Dual Rain Shower Head System
Once you have your layout planned and fixtures selected, it’s time to install your dual rain shower head system. Here’s a step-by-step guide:
Step 1: Gather Your Tools
You’ll need the following tools and materials:
- Drill
- Screwdriver
- Adjustable wrench
- Plumber’s tape
- Level
- Measuring tape
- Shower fixtures
Step 2: Turn Off the Water Supply
Before you begin any installation, make sure to turn off the water supply to avoid any leaks or water damage.
Step 3: Install the Ceiling Rain Shower Head
- Mark the Spot: Use a pencil to mark where you want the rain shower head to be installed on the ceiling.
- Drill Holes: Drill the necessary holes for the mounting brackets.
- Attach the Brackets: Secure the mounting brackets to the ceiling.
- Connect the Shower Arm: Attach the shower arm to the brackets and connect the rain shower head. Use plumber’s tape to ensure a tight seal.
Step 4: Install the Handheld Shower Head
- Mark the Spot: Determine the best height and location for the handheld shower head and mark the spot on the wall.
- Drill Holes: Drill the holes for the mounting brackets.
- Attach the Brackets: Secure the mounting brackets to the wall.
- Connect the Hose: Attach the hose to the wall bracket and connect the handheld shower head. Use plumber’s tape for a secure fit.
Step 5: Connect the Diverter Valve
A diverter valve allows you to switch between the rain shower head and the handheld shower head. Install the valve according to the manufacturer’s instructions, ensuring it’s easily accessible.
Step 6: Test the System
Turn the water supply back on and test your dual rain shower head system. Check for any leaks and make sure both shower heads are functioning correctly.
Tips for a Perfect Dual Rain Shower Layout
Consider Water Pressure
Dual shower heads can affect water pressure. Make sure your plumbing system can handle the increased demand. You may need to install a pressure-boosting pump if necessary.
Optimize for Accessibility
Ensure that the handheld shower head is easily reachable for everyone who will be using the shower. Consider installing an adjustable wall mount for added flexibility.
Use Quality Materials
Invest in high-quality fixtures and materials to ensure durability and longevity. Stainless steel or brass fixtures are excellent choices for a sleek, modern look.
Add Extra Features
Consider adding extra features such as LED lights, temperature controls, or a built-in shelf for bath products to enhance your shower experience further.
Maintenance Tips for Dual Rain Shower Heads
To keep your dual rain shower head system in top condition, regular maintenance is essential. Here are some tips:
Clean the Shower Heads
Over time, mineral deposits can clog the shower heads. Clean them regularly by soaking in a vinegar solution or using a commercial descaling product.
Check for Leaks
Periodically check for any leaks in the connections and tighten them if necessary. Replace any worn-out washers or seals to prevent water damage.
Inspect the Diverter Valve
Ensure the diverter valve is functioning correctly and switch between the shower heads smoothly. Lubricate the valve if it becomes stiff or difficult to operate.
Takeaway
Installing a dual rain shower head system can significantly enhance your bathroom’s functionality and aesthetic appeal. By following the steps outlined in this guide, you can create a luxurious and efficient shower setup that meets all your needs. Whether you’re renovating your bathroom or building a new one, a dual rain shower head system is a worthwhile investment that will provide years of enjoyment.




Leave a comment
This site is protected by hCaptcha and the hCaptcha Privacy Policy and Terms of Service apply.