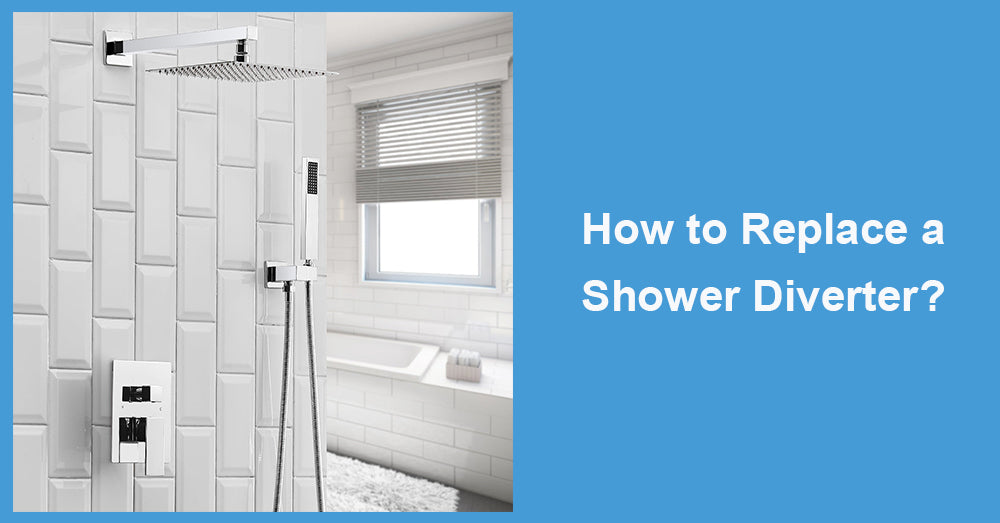
A malfunctioning shower diverter can be frustrating, especially when you're switching between the bath faucet and the showerhead, but the water doesn’t flow where it’s supposed to. The diverter is a small but crucial component that controls the flow of water, so replacing it when it's worn out or broken can make a big difference. Whether you're upgrading your fixtures to match a brushed nickel shower faucet or simply repairing an old diverter, this guide will walk you through the process.
In this article, we’ll cover what a shower diverter is, how to identify when it needs to be replaced, and how to swap it out yourself, all while incorporating tips for choosing complementary fixtures like a brushed nickel shower faucet.
What is a Shower Diverter?

A shower diverter is a valve that redirects water from the bathtub faucet to the showerhead. It’s usually found as part of the tub spout or as a dedicated valve on the faucet setup. Diverters are commonly used in combination tub-shower units, allowing you to switch between filling the tub and using the overhead shower.
There are three main types of diverters:
-
Single-valve diverters: Activated by pulling up or pushing down a knob on the tub spout.
-
Three-valve diverters: Found in setups with separate hot and cold water controls, where the middle valve controls water redirection.
-
Two-valve diverters: Often found in more modern fixtures, allowing control over both temperature and water flow.
When the diverter is faulty, water might trickle out of the showerhead even when you’re filling the tub, or it could leak continuously, leading to wasted water and an inefficient system.
Signs You Need to Replace Your Shower Diverter
Here are common signs that indicate it's time to replace your shower diverter:
-
Water flow issues: Water leaks from the showerhead even when it's supposed to be off.
-
Difficulty switching modes: The diverter gets stuck or requires significant force to switch between the faucet and showerhead.
-
Reduced water pressure: If the diverter is damaged, the water pressure in the shower can be significantly reduced.
-
Leaking faucet or diverter: Visible leaks around the spout or diverter knob suggest a worn-out diverter.
Tools and Materials You’ll Need
Before you start, gather the following tools and materials:
-
Screwdriver (flathead or Phillips, depending on your setup)
-
Adjustable wrench
-
Teflon (plumber's) tape
-
New diverter valve or tub spout with diverter
-
Plumber’s grease (optional for lubrication)
-
Cloth or rag to protect the fixture during removal
Now, let's get started on replacing that diverter!
Step-by-Step Guide to Replacing a Shower Diverter
Step 1: Turn Off the Water Supply
Before making any repairs, turn off the water supply to the shower. This can often be done by shutting off the main water supply to your house, especially if you don’t have a dedicated shut-off valve for the bathroom. After shutting off the water, turn the faucet on to drain any remaining water from the pipes.
Step 2: Remove the Old Diverter
There are different ways to remove the diverter, depending on the type of diverter you have.
For Single-Valve Diverters (Part of the Tub Spout):
-
Loosen the tub spout: Using a wrench, unscrew the tub spout that houses the diverter. Be sure to wrap a cloth around the spout to prevent scratching the finish, especially if you have a brushed nickel shower faucetor similar delicate finish.
-
Remove the diverter: Once the spout is removed, you’ll see the diverter mechanism. If it’s a separate component, you can unscrew it using a wrench or screwdriver.
For Three-Valve or Two-Valve Diverters:
-
Remove the handle: If your diverter is a separate valve on the shower, remove the handle by unscrewing it with a screwdriver.
-
Remove the diverter valve: Use an adjustable wrench to unscrew the valve from the plumbing behind the wall.
Step 3: Clean the Area
Once the diverter has been removed, inspect the threads and surrounding areas. It’s essential to clean any debris, old Teflon tape, or mineral build-up from the pipes. A clean surface ensures that the new diverter will seal properly, reducing the chance of leaks.
Step 4: Install the New Diverter
Now, it's time to install the new diverter.
For Single-Valve Diverters:
-
Apply Teflon tape: Wrap the threads of the pipe with Teflon tape to ensure a leak-free connection.
-
Screw in the new tub spout: If you’re installing a new spout with a built-in diverter, thread it onto the pipe by hand, then use a wrench to tighten it gently. Make sure the spout is aligned correctly.
For Multi-Valve Diverters:
-
Insert the new diverter valve: Align the new valve with the pipes and screw it in place with a wrench. Ensure it's secure but not overtightened.
-
Reattach the handle: After securing the diverter, reattach the handle by screwing it back into place.
Step 5: Turn the Water Back On and Test
Once the new diverter is installed, turn the water supply back on. Test the diverter by switching between the tub faucet and the showerhead. Check for leaks around the spout and ensure smooth water flow.
Step 6: Enjoy Your New Diverter
With the new diverter working properly, you can now enjoy a fully functional shower. If you’ve paired the new diverter with a brushed nickel shower faucet, you’ll not only have improved water flow but also an elegant, modern look for your bathroom.
Why Upgrade to a Brushed Nickel Shower Faucet?
If you’re upgrading your diverter, why not upgrade your shower fixtures at the same time? A brushed nickel shower faucet is a popular choice for modern bathrooms due to its sleek, matte finish and durability. Here are some reasons to consider brushed nickel:
-
Timeless aesthetic: Brushed nickel offers a neutral, matte finish that works well with a wide range of bathroom styles, from contemporary to classic.
-
Durability: The brushed finish is resistant to fingerprints, water spots, and corrosion, making it a practical choice for bathrooms.
-
Easy to clean: Unlike polished finishes, brushed nickel doesn’t show smudges or water spots as easily, making it low-maintenance.
When replacing your shower diverter, matching it with a brushed nickel shower faucet can enhance the overall look of your bathroom while providing long-lasting performance.
Maintenance Tips for Your New Diverter and Faucet
Once you’ve replaced your diverter and installed your brushed nickel shower faucet, keeping them well-maintained is essential for longevity. Here are a few tips:
-
Regular cleaning: Wipe down your faucet and diverter regularly with a soft cloth to prevent water spots and soap residue.
-
Avoid harsh cleaners: Use mild, non-abrasive cleaners to avoid damaging the finish of your brushed nickel fixtures.
-
Check for leaks: Periodically inspect your diverter and faucet for leaks. Tighten any connections as needed, and apply Teflon tape to any problematic joints.
Takeaway
Replacing a shower diverter might seem like a challenging task, but with the right tools and steps, it’s a manageable DIY project. Whether you're fixing a faulty diverter or upgrading your bathroom with a sleek brushed nickel shower faucet, this guide should help you through the process smoothly.
By following these instructions, you’ll restore full functionality to your shower and enjoy a refreshed bathroom look. Don't forget to maintain your new fixtures to keep them working and looking great for years to come.









Leave a comment
This site is protected by hCaptcha and the hCaptcha Privacy Policy and Terms of Service apply.