
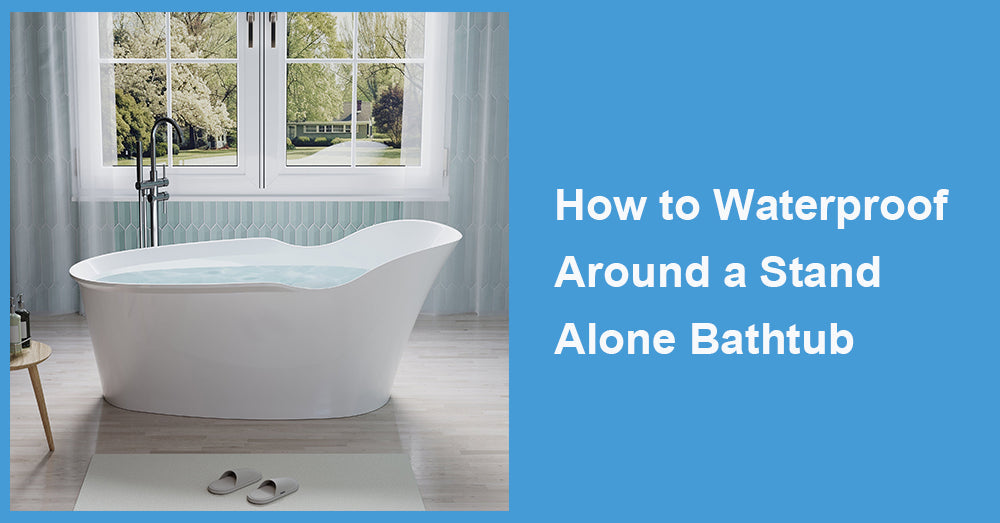
The sleek and sophisticated aesthetic of stand-alone bathtubs can elevate any bathroom's design, offering a luxurious spa-like vibe. But besides the visual appeal, practical considerations like waterproofing are non-negotiable. Without proper waterproofing around stand alone bathtubs, you risk increased water damage, mold growth, and structural issues over time—problems nobody wants to deal with.
If you're wondering how to waterproof around your stand-alone bathtub effectively, this comprehensive guide will walk you through everything you need to know. From understanding why waterproofing is important to actionable steps to get it done, let's make your bathing space gorgeous and functional.
Why is Waterproofing Around a Stand-Alone Bathtub Important?
Waterproofing is necessary for any wet area, and a bathroom is no exception. Here's why it's particularly crucial for stand-alone bathtubs:
· Prevents water damage: Water seepage into walls and floors can cause rot, weakening the structure over time.
· Stops mold and mildew: Excess moisture creates an environment where mold and mildew thrive, posing risks to both your health and your property.
· Protects your investment: Stand-alone bathtubs are often a focal point, and waterproofing them properly ensures their aesthetics are preserved without unsightly damage cropping up around the fixtures.
· Adds durability: Proper waterproofing increases the lifespan of your bathroom, so you won't need to spend thousands on unnecessary repairs.
Now that we understand why waterproofing is necessary, let's explore how to do it right.
Prepping the Space Before You Start Waterproofing
Preparation is key before beginning any waterproofing project. Here’s how you can lay the groundwork:
1. Inspect the Site
· Look for existing cracks, gaps, or signs of moisture damage around where your bathtub will sit.
· Ensure that all plumbing connections for your stand-alone bathtub are secure and leak-free.
2. Choose the Right Materials
For proper waterproofing, you'll need a mix of specialized materials, including:
· Waterproof membranes or sealants
· Silicone caulk
· Flexible waterproofing tape
· Quality grout for tiled surfaces
· A brush or a roller for application
3. Clean the Area
Ensure the floor and walls where the stand-alone bathtub will be placed are clean and free from dirt, dust, and grease. This helps all waterproofing products adhere properly.
Once the area is ready, you can move to actual waterproofing.
6 Steps to Waterproof Around a Stand-Alone Bathtub
Follow these steps to establish a solid waterproofing system around your stand-alone bathtub:
Step 1: Install a Waterproof Membrane
· Apply a waterproof membrane to the floor where your bathtub will stand. Ensure it extends a few inches up the adjacent walls for added protection.
· Use a roller or brush to spread the membrane. Allow it to dry completely (usually 24-48 hours, as per the manufacturer’s instructions).
Pro Tip: Go for a liquid waterproof membrane for more precise application in small or hard-to-reach spaces.
Step 2: Seal the Floor-to-Wall Joint
· The joint where the floor meets the wall often sees the most water exposure. Use flexible waterproofing tape to cover this area.
· Apply the tape smoothly and press it down firmly to eliminate air pockets.
Step 3: Apply Silicone Caulk
· Once your stand-alone bathtub is installed, apply a generous bead of silicone caulk where the base of the bathtub meets the floor.
· Silicone is water-resistant and remains flexible, making it perfect for sealing cracks and gaps.
How to Apply Silicone Like a Pro:
1. Cut the tube tip at a 45-degree angle for better control.
2. Use a caulking gun to apply the silicone in a continuous, steady motion.
3. Smooth the caulk with your finger or a caulking tool for a clean finish.
Step 4: Seal Tiled Surfaces
If your stand-alone bathtub is surrounded by tiled walls, sealing the grout is vital:
· Use a high-quality grout sealer and apply it between the tiles using a small brush.
· Reseal the grout every 6-12 months for optimal performance.
Step 5: Protect Wall Surfaces with Waterproof Paint
While tiles and other materials can safeguard walls, extra protection can go a long way. Waterproof paint or a water-resistant primer on the adjacent walls helps prevent seepage and adds another layer of durability.
Step 6: Install Splash Guards
For extra splash protection, especially if you don't have a shower curtain or glass screen, consider adding splash guards on the sides of your stand-alone bathtub. These are practical and prevent water from seeping under or around the tub.
Common Mistakes to Avoid When Waterproofing

To ensure a successful waterproofing project, steer clear of these common errors:
· Skipping the membrane: Some people rely solely on silicone or grout, but a waterproof membrane is essential for complete protection.
· Using low-quality materials: Budget-friendly materials may save money upfront but cost you more in repairs down the line.
· Ignoring drying times: Give each layer ample time to dry; rushing this process can compromise waterproofing effectiveness.
· Overlooking small gaps: Even minor gaps or cracks can cause issues later. Be thorough!
Maintaining Waterproofing Around a Stand-Alone Bathtub
Once your bathtub is waterproofed, proper maintenance is key to keeping it in pristine condition. Here’s how:
· Check seals regularly: Inspect silicone caulk and replace it if it starts to crack or weaken.
· Clean frequently: Wipe down the area around your stand-alone bathtub to prevent water build-up and residue.
· Address problems promptly: If you notice any leaks or water pooling, address the problem immediately to avoid extensive damage.
Why Proper Waterproofing is a Long-Term Investment
Waterproofing around a stand-alone bathtub doesn’t just protect your bathroom from potential water damage—it also boosts its overall functionality and aesthetic longevity. Well-executed waterproofing saves you from costly repairs and headaches, giving you peace of mind while you enjoy your relaxing baths.
Time to Get Started!
Now that you know how to waterproof around a stand-alone bathtub, you can complete your next project with confidence. Proper prep, high-quality materials, and attention to detail will ensure your beautiful bathtub remains the centerpiece of your bathroom—not the source of water issues!
If you're unsure or want professional assistance, contact a local waterproofing expert to help you achieve a seamless result. Remember, a little preparation goes a long way in keeping your bathroom both stylish and functional. Happy waterproofing!


Leave a comment
This site is protected by hCaptcha and the hCaptcha Privacy Policy and Terms of Service apply.