
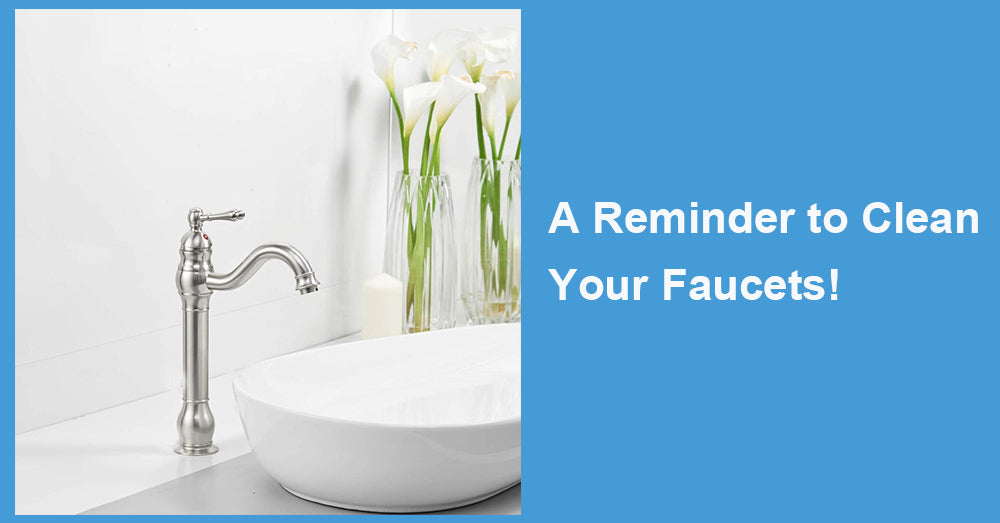
Is your faucet looking a little... less shiny lately? Don’t worry—you’re not alone! Faucets work hard every single day, whether it’s delivering water for your skincare routine or filling the pot for your favourite pasta recipe. Over time, they can accumulate grime, hard water stains, and even bacteria. The good news? You don’t need to replace your faucet to bring back that sparkle. With a little cleaning, your well-loved Wellfor faucet (or any faucet, really) can look good as new and perform at its best!
l Introduction
l Why Regular Faucet Cleaning Matters
l Tools and Materials You’ll Need
l Step-by-Step Faucet Cleaning Guide
l Tips for Different Faucet Finishes
l Additional Maintenance Advice
If you’ve never thought much about cleaning your faucets, or you’re not entirely sure how to do it, this guide is for you. We’ll walk you through why it’s important, how often you should clean them, and actionable steps to keep your faucets gleaming. Stick around—we’ve got expert tips inspired by competitors and proven methods you’ll love!
Why Clean Your Faucets?
Truth time. When was the last time you gave your faucet a proper scrub? If you’re feeling even the slightest twinge of guilt, don’t worry—we get it. Faucets are often overlooked in our cleaning routines, but they shouldn’t be. Here’s why:
Prevent Mineral Build-Up
Depending on where you live, your water may contain high levels of minerals like calcium and magnesium. Over time, this "hard water" leads to white, chalky residue building up around your faucet—especially on chrome or stainless steel finishes. By cleaning regularly, you prevent stubborn mineral deposits from forming.
Eliminate Bacteria and Germs
Think about all the things our hands touch before turning on the faucet. Yep, faucets can harbor germs and bacteria. Without regular cleaning, they could potentially transfer to your hands or anything you’re washing.
Maintain Aesthetic Appeal
A gleaming faucet can elevate the entire look of your kitchen or bathroom. It’s hard to feel proud of your space when dull, spotted faucets bring down the vibe.
Prolong the Life of Your Faucet
Mineral build-ups and grime don’t just impact looks—they can also affect your faucet’s functionality. Regular cleaning helps ensure smooth water flow and longer-lasting hardware.
Pro Tip: If you have a Wellfor faucet, you’ve already invested in a quality, long-lasting product. Cleaning it regularly ensures you get the most out of your investment.
How Often Should You Clean Your Faucet?
The frequency of cleaning really depends on how often you use the faucet and your local water quality. Here’s a good general rule:
· Weekly: Wipe down your faucet with a damp microfiber cloth to prevent dirt, water spots, and fingerprints from building up.
· Monthly (or as needed): Deep-clean your faucet to remove mineral deposits, stains, and any hidden grime around the nooks and crannies.
Busy lifestyle? Same here! The trick is breaking the task down. A quick wipe every few days makes the deep-cleaning process so much easier.
Did you know? Homes with hard water may require more frequent cleaning compared to homes with soft water to prevent stubborn buildup.
Step-by-Step Guide to Cleaning Your Faucet
Whether you own a chic chrome Wellfor faucet or an industrial stainless steel number, these cleaning steps will work wonders for you.
Step 1: Gather Your Supplies
To clean your faucets effectively, you’ll need:
· A microfiber cloth
· Dish soap
· White vinegar
· Baking soda
· An old toothbrush
· Plastic bag (for soaking faucet heads)
· Rubber bands
Step 2: Start with a Surface Wipe
Dip a microfiber cloth into warm, soapy water and wipe down the entire surface of the faucet. This removes easy-to-reach dirt, grease, and fingerprints.
Pro Tip: For chrome or stainless steel finishes, avoid abrasive sponges that could scratch the surface. Stick to non-scratch cloths or pads.
Step 3: Tackle Stubborn Water Spots
Hard water stains are the most common problem. To combat this, mix equal parts water and white vinegar in a spray bottle. Spray the solution onto your faucet, then use a soft cloth to gently wipe it clean.
If the stains are particularly stubborn, soak a cloth in vinegar, wrap it around the problem area, and leave it for 15–20 minutes. Rinse and wipe clean. Magic!
Step 4: Clean the Faucet Head
Your faucet head is often the main victim of mineral deposits, which can block water flow. Here’s how to clean it:
1. Fill a plastic bag with white vinegar.
2. Attach the bag around the faucet head, securing it with a rubber band.
3. Leave it to soak for 30 minutes to an hour.
4. Remove the bag, scrub gently with a toothbrush, and rinse.
Step 5: Restore Shine
For an extra sparkle, dry the faucet with a clean microfiber cloth. You can also apply a few drops of olive oil for a shiny, polished finish.
Tip for Wellfor Faucets: Many Wellfor products feature sleek finishes that are naturally resistant to fingerprints and water spots, but an olive oil polish can enhance their natural beauty.
Step 6: Regular Maintenance
Make it a habit to clean your faucet weekly to avoid buildup. Quick, consistent cleaning beats long, tedious scrubbing sessions every time.
Extra Tips for Special Finishes
Different faucet finishes require unique care:
· Chrome: Chrome faucets, such as those found in Wellfor's premium range, respond beautifully to vinegar-based cleaning solutions. Just don’t leave vinegar on for too long to avoid discoloration.
· Matte Black: Buff with a damp microfiber cloth; avoid abrasive cleaners.
· Brass: Use mild soap and water. Steer clear of lemon or vinegar, as they may tarnish the finish.
· Stainless Steel: Polish with a bit of olive oil for a fingerprint-free glow.
Pro Tip: Always check your faucet manual for specific cleaning recommendations.
Cleaning your faucet shouldn’t be a big deal. With the right techniques and regular upkeep, you’ll not only keep your faucet looking brand-new, you’ll improve its performance and extend its lifespan. Sounds like such a small effort to take good care of a Wellfor faucet (or any faucet) but one of those efforts that yield big results.
And, while we’re on the topic—when was the last time you cleaned the underside of your faucet? Go on, take a peek. Don’t worry, we won’t judge. With this guide in hand, you have the tools to figure that out, too.
Your kitchen or bath could sparkle so much more, and it all begins with a little love on the humble faucet. Trust us—it’s worth it!
Got a favourite faucet cleaning tip? Spill ’em in the comments below, and let’s keep the stimulator-gazing community clean!


Leave a comment
This site is protected by hCaptcha and the hCaptcha Privacy Policy and Terms of Service apply.