

Due to continuous use, these cartridges can also wear out with time and may cause certain issues such as leakages, too hot or cold water issues, or erratic water flow. Replacing the cartridge will solve all these problems and will give your shower faucet years of life by maintaining its efficiency and effectiveness. If you have recently installed a brushed nickel shower faucet, keeping the cartridge in good condition will become essential for maintaining its efficiency.
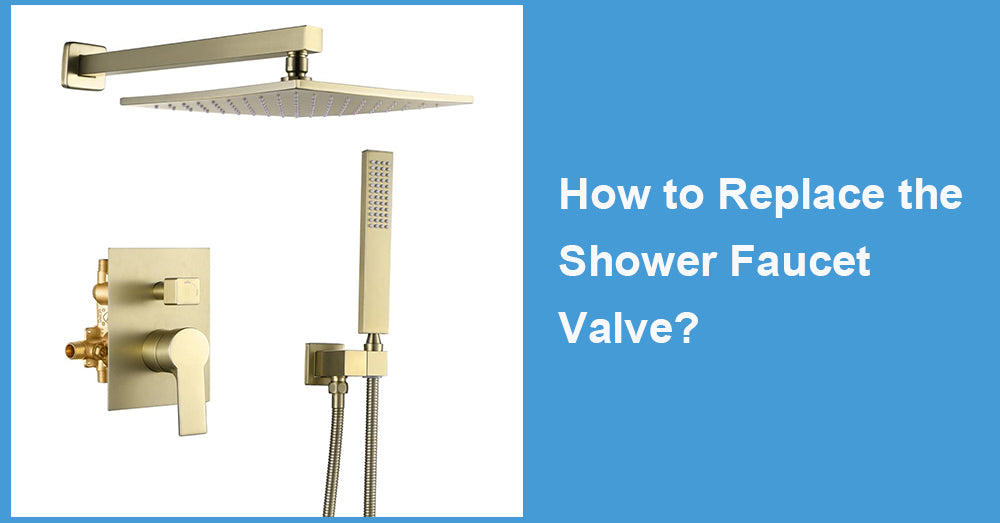
This article will guide you through a step-by-step shower cartridge change to keep your shower functional and stylish.
What is a Shower Cartridge?

The cartridge is like a valve that regulates the flow and temperature of water from your shower. It forms part of a faucet assembly and is vital in mixing hot and cold water in the right proportions to achieve the desired temperature. When this cartridge gets worn or damaged, annoying dripping water or improper temperature mixing can occur, sometimes causing complete failure to turn on or off the water.
Common signs that indicate your shower cartridge needs replacing:
Leaking showerhead: Water drips even when the faucet is turned off.
Difficulty adjusting water temperature: The water temperature fluctuates or is hard to control.
Reduced water pressure: Poor water flow despite the water pressure being fine in other areas of your home.
Handle issues: The handle feels loose or stiff or doesn't turn smoothly.
Tools and Materials You'll Need
Before you start the replacement process, gather the following tools and materials:
Screwdriver (flathead or Phillips, depending on your faucet)
Adjustable wrench or pliers
Cartridge puller (optional, depending on your faucet model)
New shower cartridge (compatible with your faucet model)
Teflon (plumber's) tape
Plumber's grease (optional for lubricating seals)
Cloth or towel to protect the faucet finish
If you're working with a modern brushed nickel shower faucet, handling the components carefully is especially important to avoid scratching or damaging the finish.
Step-by-Step Guide to Replacing a Shower Cartridge
Step 1: Turn Off the Water Supply
First, you will need to turn off the water supply feeding the shower. You could either do that by switching off the water to the house or, if there's a shut-off valve just for the bathroom, use that. Once the water is turned off, you must turn the shower faucet on to drain any remaining water from the pipes.
Tip: After shutting off the water, turning the faucet on is essential to release any pressure in the lines.
Step 2: Remove the Shower Handle
You’ll first need to remove the shower handle to access the cartridge. Here's how to do it:
1.Locate the screw: Most shower handles have a small screw that secures them to the valve. You might need to remove a decorative cover to find the screw. Use a flathead screwdriver to pop off the cover gently.
2.Unscrew the handle: Using a screwdriver, remove the screw and set it aside. Gently pull the handle off the valve stem. If it's stuck, apply light pressure to loosen it, but be careful not to force it.
Step 3: Remove the Trim Plate and Other Components
Once the handle is off, remove the trim plate and any other components covering the cartridge.
1.Unscrew the trim plate: Use a screwdriver to remove the screws holding the trim plate in place. Set the screws aside and carefully remove the plate, exposing the valve and cartridge.
2.Remove retaining clips: Depending on your faucet model, a retaining clip or nut may hold the cartridge in place. Use pliers to remove the clip or unscrew the nut.
Step 4: Remove the Old Cartridge
Now that the cartridge is exposed, it's time to remove it. If it's stuck, use a cartridge puller (a tool designed to make cartridge removal more accessible). If necessary, you can often purchase one at your local hardware store.
1.Pull out the cartridge: Grip it with pliers or a cartridge puller and pull it straight out of the valve body. If it's resistant, twist it gently as you pull to loosen it.
2.Inspect the old cartridge: Check for signs of wear, corrosion, or damage. If your water has been dripping or you've had trouble controlling the temperature, the cartridge is likely the culprit.
Step 5: Install the New Cartridge
With the old cartridge removed, it's time to install the new one. Ensure you have the correct replacement cartridge for your faucet model.
1.Apply plumber's grease (optional): Apply a small amount of plumber's grease to the rubber O-rings on the new cartridge. This helps ensure a smooth fit and prevents leaks.
2.Please insert the new cartridge. Align the new cartridge with the valve body and carefully push it into place. Make sure it's fully seated.
3.Reattach the retaining clip: If your faucet uses a retaining clip or nut, reattach it to secure the cartridge.
Tip: Be mindful when handling the faucet's components, especially if you have a brushed nickel shower faucet, as this material can be sensitive to scratches.
Step 6: Reassemble the Faucet
Once the new cartridge is installed, it's time to reassemble the faucet.
1.Reattach the trim plate: Secure the trim plate back in place by screwing it in with a screwdriver.
2.Reinstall the handle: Slide the handle back onto the valve stem and secure it with the screw you removed earlier. Replace the decorative cover, if applicable.
Step 7: Turn the Water Supply Back On
After everything is reassembled, turn the water supply back on. Slowly open the shower faucet and test the water flow and temperature to ensure everything works correctly.
Check for leaks: Carefully inspect the faucet and surrounding area for any signs of leaks. If water is leaking, tighten the screws or reapply Teflon tape to the connections.
Step 8: Enjoy Your Refreshed Shower
Congratulations! You have changed your shower cartridge. Your shower will not only run a great deal smoother, but you have also extended the life of your faucet-mostly when combined with a brushed nickel shower faucet that adds style and flair to the modern bathroom.
Choosing the Right Shower Cartridge for Your Faucet
When selecting a replacement cartridge, getting one compatible with your faucet model is essential. Here's how to make sure you choose the right one:
1.Know your faucet brand and model: Look up your faucet's manufacturer and model number. This information is typically found in the original installation manual or can be identified by looking up the faucet's design online.
2.Check compatibility: Once you have your faucet's brand and model number, ensure the new cartridge is designed to fit. Some cartridges are universal, while others are brand-specific.
3.Match your faucet's finish: If you're updating your fixtures, consider upgrading to a brushed nickel shower faucet to create a consistent, polished look in your bathroom.
Why Consider a Brushed Nickel Shower Faucet?
If you are already replacing your shower cartridge, switching to an entirely new faucet is a good time. A brushed nickel shower faucet is sleek and stylish, not to mention full of function. Here's why it's a great choice to make:
Durability: Brushed nickel is highly resistant to scratches, corrosion, and tarnishing, making it a long-lasting option for bathroom fixtures.
Low maintenance: Unlike shiny chrome, brushed nickel doesn't show fingerprints or water spots as easily, making cleaning easier.
Versatility: Its neutral, matte finish complements a wide range of bathroom designs, from traditional to modern.
Maintenance Tips for Your New Cartridge and Faucet
Now that you've replaced your shower cartridge and possibly upgraded to a brushed nickel shower faucet, keeping it well-maintained is essential. Here are some tips:
1.Clean regularly: Wipe down your faucet with a soft cloth to prevent water spots and soap residue from building up after each use.
2.Use mild cleaners: Avoid harsh chemical cleaners that could damage the finish of your faucet, especially if it's brushed nickel.
3.Check for leaks: Periodically check for leaks around the handle or spout and replace the cartridge to maintain proper function.
Final Thoughts
Replacing a shower cartridge is a simple task, but it's a pretty important one. Whether you have a faucet that leaks or a water temperature that doesn't feel right, follow this step-by-step guide to finish the job quickly. Pair your new cartridge with a brushed nickel shower faucet to increase your bathroom's style and longevity for a shower that looks as great as it seems.
The right tools and patience will help keep your shower running smoothly and looking modern for years to come.
This article will guide you through a step-by-step shower cartridge change to keep your shower functional and stylish.
What is a Shower Cartridge?
The cartridge is like a valve that regulates the flow and temperature of water from your shower. It forms part of a faucet assembly and is vital in mixing hot and cold water in the right proportions to achieve the desired temperature. When this cartridge gets worn or damaged, annoying dripping water or improper temperature mixing can occur, sometimes causing complete failure to turn on or off the water.
Common signs that indicate your shower cartridge needs replacing:
Leaking showerhead: Water drips even when the faucet is turned off.
Difficulty adjusting water temperature: The water temperature fluctuates or is hard to control.
Reduced water pressure: Poor water flow despite the water pressure being fine in other areas of your home.
Handle issues: The handle feels loose or stiff or doesn't turn smoothly.
Tools and Materials You'll Need
Before you start the replacement process, gather the following tools and materials:
Screwdriver (flathead or Phillips, depending on your faucet)
Adjustable wrench or pliers
Cartridge puller (optional, depending on your faucet model)
New shower cartridge (compatible with your faucet model)
Teflon (plumber's) tape
Plumber's grease (optional for lubricating seals)
Cloth or towel to protect the faucet finish
If you're working with a modern brushed nickel shower faucet, handling the components carefully is especially important to avoid scratching or damaging the finish.
Step-by-Step Guide to Replacing a Shower Cartridge
Step 1: Turn Off the Water Supply
First, you will need to turn off the water supply feeding the shower. You could either do that by switching off the water to the house or, if there's a shut-off valve just for the bathroom, use that. Once the water is turned off, you must turn the shower faucet on to drain any remaining water from the pipes.
Tip: After shutting off the water, turning the faucet on is essential to release any pressure in the lines.
Step 2: Remove the Shower Handle
You’ll first need to remove the shower handle to access the cartridge. Here's how to do it:
1.Locate the screw: Most shower handles have a small screw that secures them to the valve. You might need to remove a decorative cover to find the screw. Use a flathead screwdriver to pop off the cover gently.
2.Unscrew the handle: Using a screwdriver, remove the screw and set it aside. Gently pull the handle off the valve stem. If it's stuck, apply light pressure to loosen it, but be careful not to force it.
Step 3: Remove the Trim Plate and Other Components
Once the handle is off, remove the trim plate and any other components covering the cartridge.
1.Unscrew the trim plate: Use a screwdriver to remove the screws holding the trim plate in place. Set the screws aside and carefully remove the plate, exposing the valve and cartridge.
2.Remove retaining clips: Depending on your faucet model, a retaining clip or nut may hold the cartridge in place. Use pliers to remove the clip or unscrew the nut.
Step 4: Remove the Old Cartridge
Now that the cartridge is exposed, it's time to remove it. If it's stuck, use a cartridge puller (a tool designed to make cartridge removal more accessible). If necessary, you can often purchase one at your local hardware store.
1.Pull out the cartridge: Grip it with pliers or a cartridge puller and pull it straight out of the valve body. If it's resistant, twist it gently as you pull to loosen it.
2.Inspect the old cartridge: Check for signs of wear, corrosion, or damage. If your water has been dripping or you've had trouble controlling the temperature, the cartridge is likely the culprit.
Step 5: Install the New Cartridge
With the old cartridge removed, it's time to install the new one. Ensure you have the correct replacement cartridge for your faucet model.
1.Apply plumber's grease (optional): Apply a small amount of plumber's grease to the rubber O-rings on the new cartridge. This helps ensure a smooth fit and prevents leaks.
2.Please insert the new cartridge. Align the new cartridge with the valve body and carefully push it into place. Make sure it's fully seated.
3.Reattach the retaining clip: If your faucet uses a retaining clip or nut, reattach it to secure the cartridge.
Tip: Be mindful when handling the faucet's components, especially if you have a brushed nickel shower faucet, as this material can be sensitive to scratches.
Step 6: Reassemble the Faucet
Once the new cartridge is installed, it's time to reassemble the faucet.
1.Reattach the trim plate: Secure the trim plate back in place by screwing it in with a screwdriver.
2.Reinstall the handle: Slide the handle back onto the valve stem and secure it with the screw you removed earlier. Replace the decorative cover, if applicable.
Step 7: Turn the Water Supply Back On
After everything is reassembled, turn the water supply back on. Slowly open the shower faucet and test the water flow and temperature to ensure everything works correctly.
Check for leaks: Carefully inspect the faucet and surrounding area for any signs of leaks. If water is leaking, tighten the screws or reapply Teflon tape to the connections.
Step 8: Enjoy Your Refreshed Shower
Congratulations! You have changed your shower cartridge. Your shower will not only run a great deal smoother, but you have also extended the life of your faucet-mostly when combined with a brushed nickel shower faucet that adds style and flair to the modern bathroom.
Choosing the Right Shower Cartridge for Your Faucet
When selecting a replacement cartridge, getting one compatible with your faucet model is essential. Here's how to make sure you choose the right one:
1.Know your faucet brand and model: Look up your faucet's manufacturer and model number. This information is typically found in the original installation manual or can be identified by looking up the faucet's design online.
2.Check compatibility: Once you have your faucet's brand and model number, ensure the new cartridge is designed to fit. Some cartridges are universal, while others are brand-specific.
3.Match your faucet's finish: If you're updating your fixtures, consider upgrading to a brushed nickel shower faucet to create a consistent, polished look in your bathroom.
Why Consider a Brushed Nickel Shower Faucet?
If you are already replacing your shower cartridge, switching to an entirely new faucet is a good time. A brushed nickel shower faucet is sleek and stylish, not to mention full of function. Here's why it's a great choice to make:
Durability: Brushed nickel is highly resistant to scratches, corrosion, and tarnishing, making it a long-lasting option for bathroom fixtures.
Low maintenance: Unlike shiny chrome, brushed nickel doesn't show fingerprints or water spots as easily, making cleaning easier.
Versatility: Its neutral, matte finish complements a wide range of bathroom designs, from traditional to modern.
Maintenance Tips for Your New Cartridge and Faucet
Now that you've replaced your shower cartridge and possibly upgraded to a brushed nickel shower faucet, keeping it well-maintained is essential. Here are some tips:
1.Clean regularly: Wipe down your faucet with a soft cloth to prevent water spots and soap residue from building up after each use.
2.Use mild cleaners: Avoid harsh chemical cleaners that could damage the finish of your faucet, especially if it's brushed nickel.
3.Check for leaks: Periodically check for leaks around the handle or spout and replace the cartridge to maintain proper function.
Final Thoughts
Replacing a shower cartridge is a simple task, but it's a pretty important one. Whether you have a faucet that leaks or a water temperature that doesn't feel right, follow this step-by-step guide to finish the job quickly. Pair your new cartridge with a brushed nickel shower faucet to increase your bathroom's style and longevity for a shower that looks as great as it seems.
The right tools and patience will help keep your shower running smoothly and looking modern for years to come.


Leave a comment
This site is protected by hCaptcha and the hCaptcha Privacy Policy and Terms of Service apply.